Railway
Railway is a cloud platform that makes it easy to deploy Tracearr with TimescaleDB and Redis.
This guide will walk you through the process of deploying Tracearr on Railway in just a few steps.
Deploy on Railway
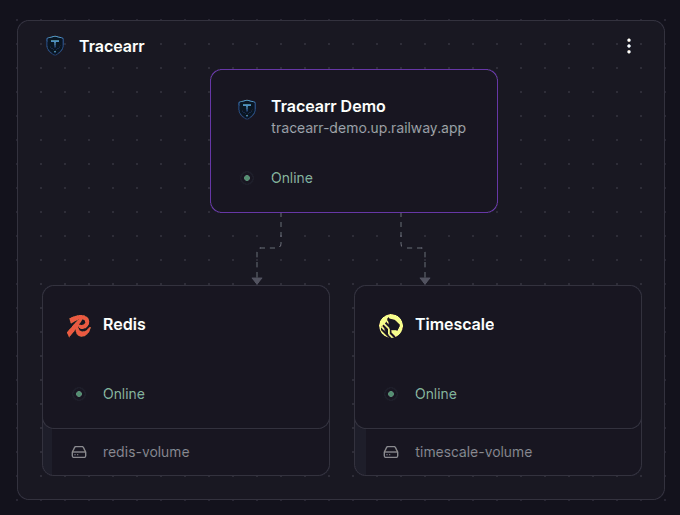
This will provision:
- Tracearr application
- TimescaleDB database
- Redis cache
You’ll need a Railway account to deploy.
Railway offers a free trial with limited usage, and paid plans start at $5/month.
Our test deployment on Railway costs around $3.50/month, but actual costs may vary based on usage.
We recommend turning on cost control features in Railway to avoid unexpected charges.
Click 
You’ll be taken to the Railway template page showing the three services that will be provisioned.
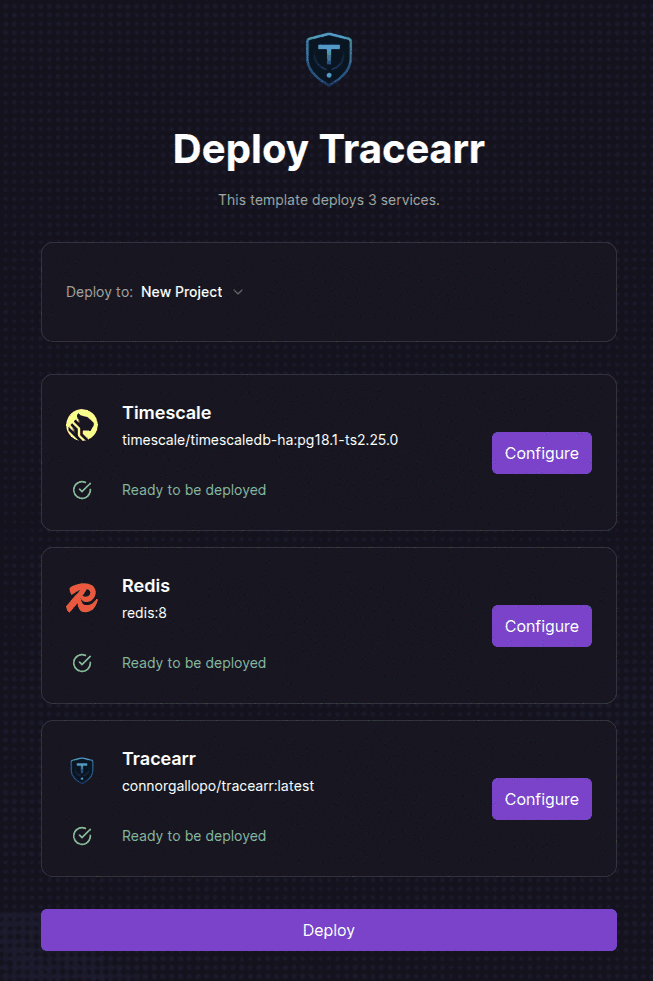
Configure the Tracearr service
Click Configure on the Tracearr service card to set your environment variables.
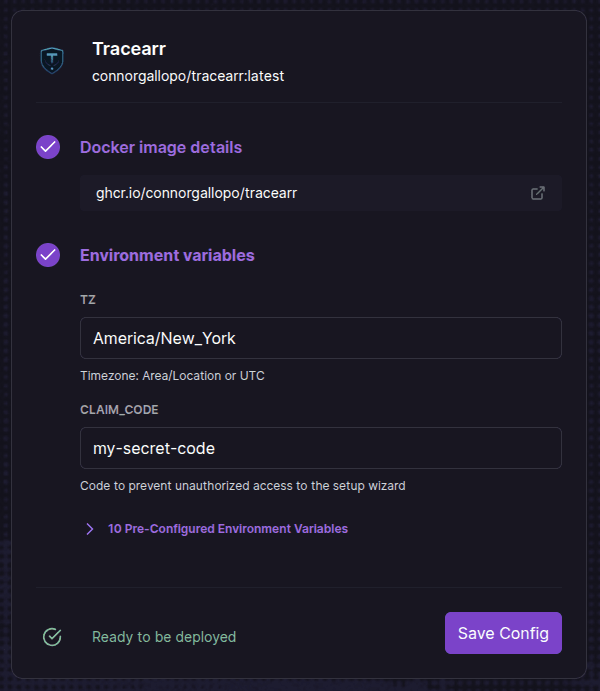
Set your timezone and claim code
Fill in the TZ variable with your timezone (e.g. America/New_York) and set a CLAIM_CODE to secure the setup wizard. Click Save Config when done.
Click Deploy
Once configured, click the Deploy button at the bottom of the template page. Railway will provision all three services automatically.
Wait for deployment to complete
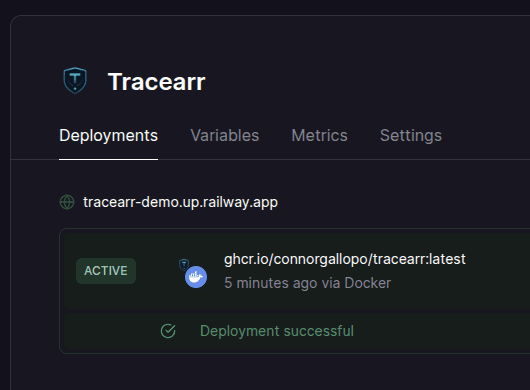
Click on your Tracearr service
Find the Tracearr URL in the Deployments tab
Click on the URL to access the Tracearr setup wizard.
In this example, the URL is tracearr-demo.up.railway.app.
It may take a minute for the URL to become active after deployment.
Complete the Tracearr setup wizard
Enter your Claim Code and create an admin account to finish the setup wizard.
Once completed, you can start adding media servers and enjoy Tracearr on Railway!
Done
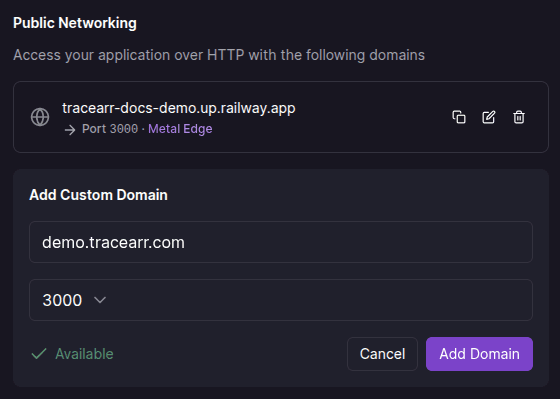
Custom Domain
To use a custom domain, go to your service’s Settings > Networking > Custom Domain and follow Railway’s instructions to configure your DNS records.
Updating Tracearr
To update Tracearr, you can either enable automatic updates or manually apply updates when prompted. Both methods ensure you get the latest features and security patches with minimal downtime.
Automatic Updates
Go to the Railway dashboard
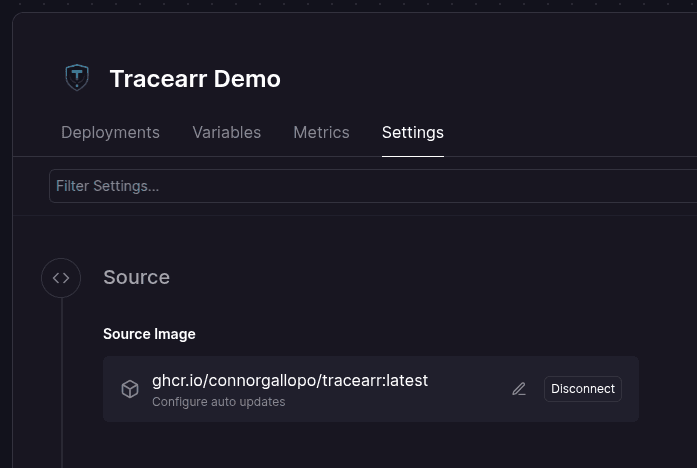
Click on your Tracearr service
In the Settings tab, click "Configure auto updates" in the Source section
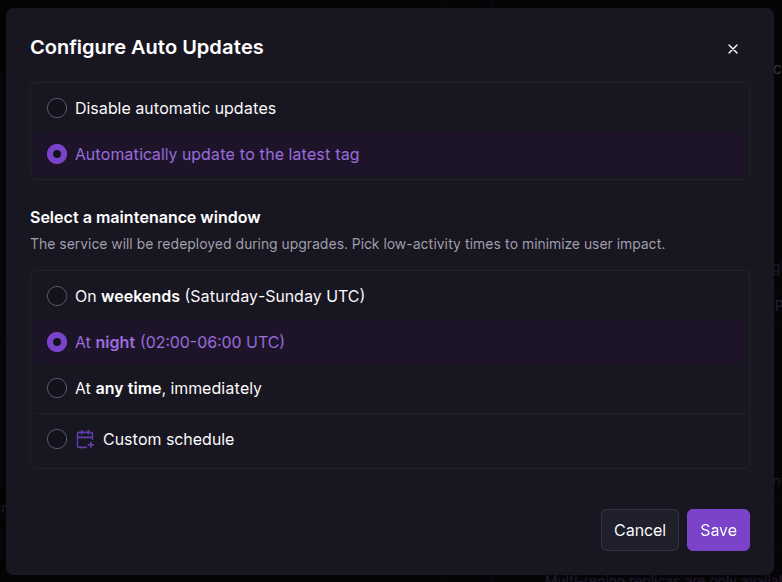
Configure Auto Updates and hit "Save"
Done
Manual Updates
Go to the Railway dashboard
Click on your Tracearr service
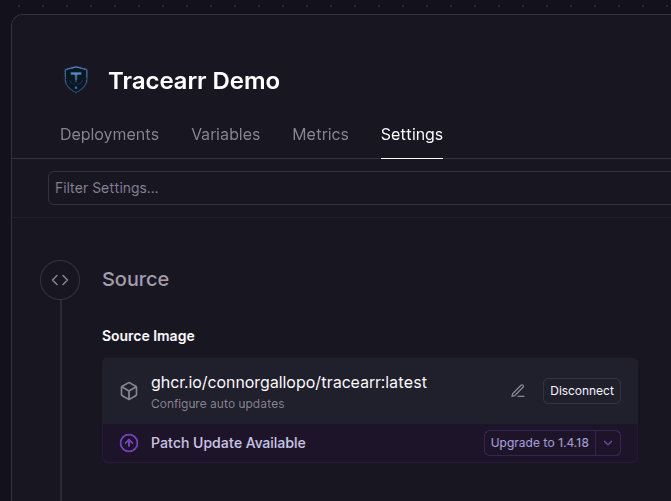
In the Settings tab, click Upgrade in the Source section
Done
Next Steps
Once Tracearr is running, connect your first media server.